SpringBoot跨系统单点登陆的实现
什么是单点登陆
单点登录(英语:Single sign-on,缩写为 SSO),又译为单一签入,一种对于许多相互关连,但是又是各自独立的软件系统,提供访问控制的属性。当拥有这项属性时,当用户登录时,就可以获取所有系统的访问权限,不用对每个单一系统都逐一登录。这项功能通常是以轻型目录访问协议(LDAP)来实现,在服务器上会将用户信息存储到LDAP数据库中。相同的,单一退出(single sign-off)就是指,只需要单一的退出动作,就可以结束对于多个系统的访问权限。
单点登陆带来的好处
- 降低访问第三方网站的风险(不存储用户密码,或在外部管理)
- 减少因不同的用户名和密码组合而带来的密码疲劳
- 减少为相同的身份重新输入密码所花费的时间
- 因减少与密码相关的调用IT服务台的次数而降低IT成本
单点登陆技术
现在很多语言都拥有自己的单点登陆实现方案,本次案例中我们用SpringBoot Oauh2来实现跨系统的单点登陆
单点登陆 流程
你的项目可能有很多个模块,如订单管理、商户管理、会员管理、财务管理,这些都是需要登陆后才能访问,当我只要登陆一次,其它的系统都能访问。
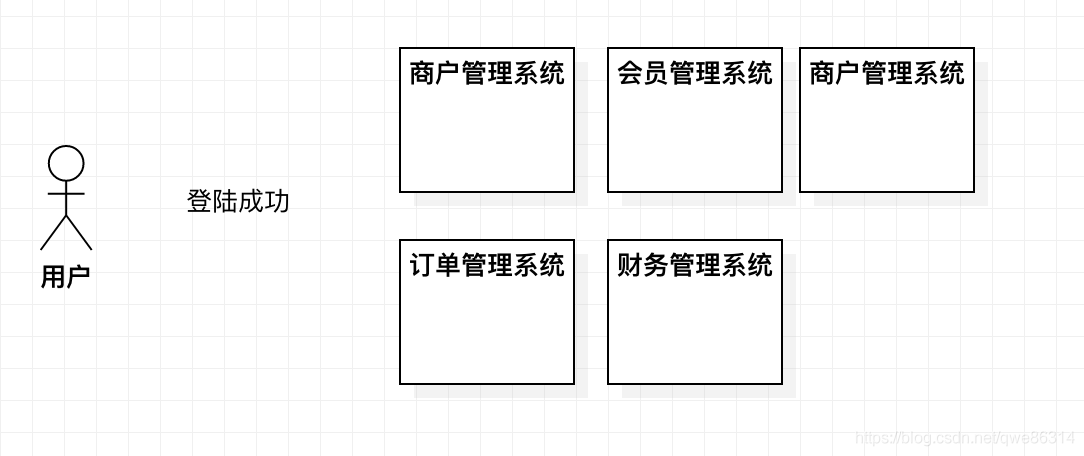
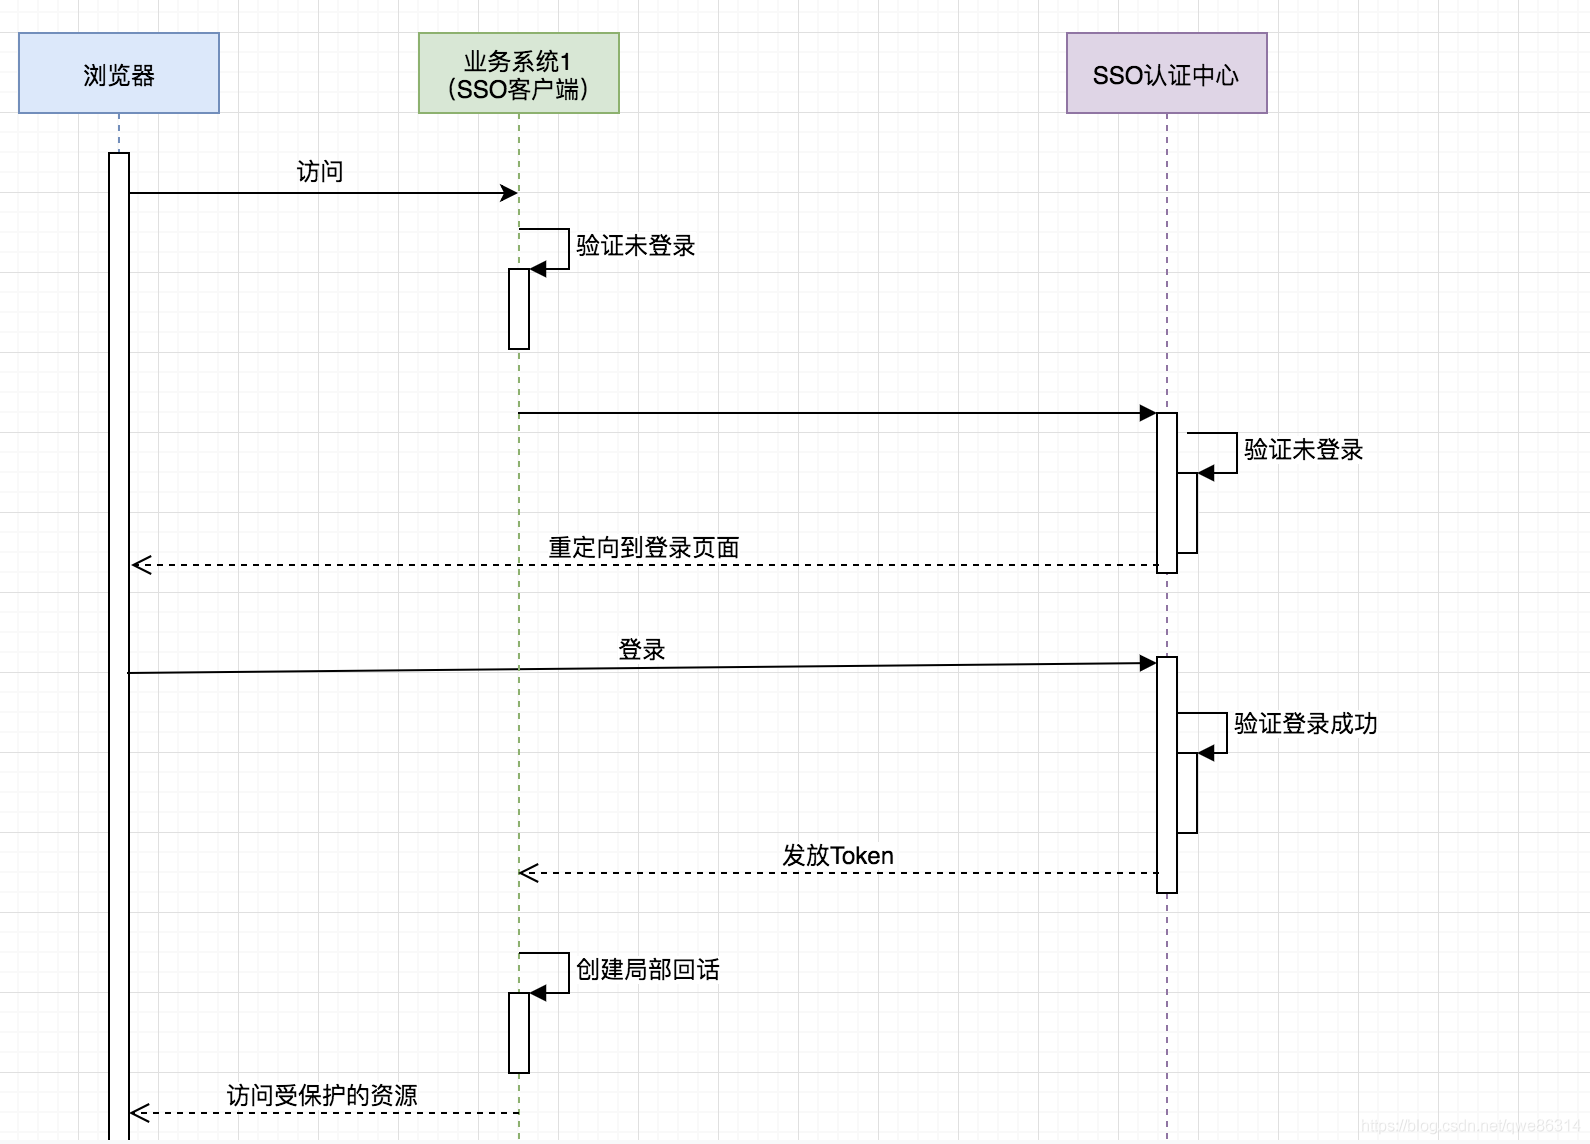
ps这张图网上找的,也是最清晰描述单点登陆的流程,如上图就是最基本的单点登陆流程。
oauth2 的四种模式:
密码模式(resource owner password credentials)
授权码模式(authorization code)
简化模式(implicit)
客户端模式(client credentials)
我们一般都用授权码模式 这个模式用的人也最多。
这几种模式如果想要了解的更清楚可以看阮一峰老师的oauth2
阮一峰老师的oauth2精讲
单点登陆准备工作
首先我们创建一个叫spring_sso_parent 普通的maven工程 作为整个项目的父工程,创建好后,删除src目录,并且修改pom.xml的依赖
spring_sso_parent 父工程的依赖如下:
	<?xml version="1.0" encoding="UTF-8"?>
<project xmlns="http://maven.apache.org/POM/4.0.0"
 xmlns:xsi="http://www.w3.org/2001/XMLSchema-instance"
 xsi:schemaLocation="http://maven.apache.org/POM/4.0.0 http://maven.apache.org/xsd/maven-4.0.0.xsd">
 <modelVersion>4.0.0</modelVersion>
 <!-- 父工程 -->
 <parent>
 <groupId>org.springframework.boot</groupId>
 <artifactId>spring-boot-starter-parent</artifactId>
 <version>2.1.6.RELEASE</version>
 <relativePath/>
 </parent>
 <groupId>cn.com.scitc</groupId>
 <artifactId>spring_sso_parent</artifactId>
 <version>1.0-SNAPSHOT</version>
 <packaging>war</packaging>
<!-- 通用配置 -->
 <properties>
 <project.build.sourceEncoding>UTF-8</project.build.sourceEncoding>
 <project.reporting.outputEncoding>UTF-8</project.reporting.outputEncoding>
 <java.version>1.8</java.version>
 <!-- spring oauth2 版本 -->
 <oauth.version>2.3.6.RELEASE</oauth.version>
 <!-- Spring Security OAuth2 AutoConfigure 版本 -->
 <oauth-auto.version>2.1.6.RELEASE</oauth-auto.version>
 </properties>
</project>
- 1
- 2
- 3
- 4
- 5
- 6
- 7
- 8
- 9
- 10
- 11
- 12
- 13
- 14
- 15
- 16
- 17
- 18
- 19
- 20
- 21
- 22
- 23
- 24
- 25
- 26
- 27
- 28
- 29
- 30
- 31
- 32
开始编写单点登陆
我们在spring_sso_parent 父工程中 添加一个子模块叫oauth_server的SpringBoot工程,
依赖如下
	<?xml version="1.0" encoding="UTF-8"?>
<project xmlns="http://maven.apache.org/POM/4.0.0" xmlns:xsi="http://www.w3.org/2001/XMLSchema-instance"
 xsi:schemaLocation="http://maven.apache.org/POM/4.0.0 http://maven.apache.org/xsd/maven-4.0.0.xsd">
 <modelVersion>4.0.0</modelVersion>
 <parent>
 <groupId>cn.com.scitc</groupId>
 <artifactId>spring_sso_parent</artifactId>
 <version>1.0-SNAPSHOT</version>
 </parent>
 <groupId>cn.com.scitc</groupId>
 <artifactId>oauth_server</artifactId>
 <version>0.0.1-SNAPSHOT</version>
 <name>oauth_server</name>
 <packaging>war</packaging>
 <description>this is oauth2 server</description>
 <dependencies>
 <dependency>
 <groupId>org.springframework.boot</groupId>
 <artifactId>spring-boot-starter-web</artifactId>
 </dependency>
 <dependency>
 <groupId>org.springframework.boot</groupId>
 <artifactId>spring-boot-starter-thymeleaf</artifactId>
 </dependency>
 <dependency>
 <groupId>org.springframework.security.oauth</groupId>
 <artifactId>spring-security-oauth2</artifactId>
 <version>${oauth.version}</version>
 </dependency>
 <dependency>
 <groupId>org.springframework.boot</groupId>
 <artifactId>spring-boot-devtools</artifactId>
 <scope>runtime</scope>
 <optional>true</optional>
 </dependency>
 <dependency>
 <groupId>org.springframework.boot</groupId>
 <artifactId>spring-boot-starter-test</artifactId>
 <scope>test</scope>
 </dependency>
 </dependencies>
 <build>
 <plugins>
 <plugin>
 <groupId>org.springframework.boot</groupId>
 <artifactId>spring-boot-maven-plugin</artifactId>
 </plugin>
 </plugins>
 </build>
</project>
- 1
- 2
- 3
- 4
- 5
- 6
- 7
- 8
- 9
- 10
- 11
- 12
- 13
- 14
- 15
- 16
- 17
- 18
- 19
- 20
- 21
- 22
- 23
- 24
- 25
- 26
- 27
- 28
- 29
- 30
- 31
- 32
- 33
- 34
- 35
- 36
- 37
- 38
- 39
- 40
- 41
- 42
- 43
- 44
- 45
- 46
- 47
- 48
- 49
- 50
- 51
- 52
- 53
- 54
- 55
- 56
- 57
- 58
- 59
需要注意的是这里的SpringBoot 版本使用的是父模块的版本
	<parent>
 <groupId>cn.com.scitc</groupId>
 <artifactId>spring_sso_parent</artifactId>
 <version>1.0-SNAPSHOT</version>
</parent>
- 1
- 2
- 3
- 4
- 5
我们在oauth_server 中创建一个config的包,并且创建一个WebSecurityConfig的类
	@Configuration
@Order(1)
public class WebSecurityConfig extends WebSecurityConfigurerAdapter {
 @Override
 protected void configure(HttpSecurity http) throws Exception {
 http.requestMatchers()
 .antMatchers("/login")
 .antMatchers("/oauth/authorize")
 .and()
 .authorizeRequests()
 .anyRequest().authenticated()
 .and()
 .formLogin().loginPage("/login").permitAll()
 .and().csrf().disable();
 }
 @Override
 protected void configure(AuthenticationManagerBuilder auth) throws Exception {
 //使用内存模拟数据库查询的用户
 auth.inMemoryAuthentication() //内存认证
 .withUser("admin")//admin 内存认证用户名
 .password(passwordEncoder().encode("123456"))//被加密的123456密码
 .roles("ADMIN");//ROLE_ADMIN的角色
 }
 @Bean
 public PasswordEncoder passwordEncoder() {
 return new BCryptPasswordEncoder();
 }
}
- 1
- 2
- 3
- 4
- 5
- 6
- 7
- 8
- 9
- 10
- 11
- 12
- 13
- 14
- 15
- 16
- 17
- 18
- 19
- 20
- 21
- 22
- 23
- 24
- 25
- 26
- 27
- 28
- 29
- 30
- 31
这个类使用了两个注解,@Configuration 让这个类成为了一个配置类, @Order(1) 这个注解是优先级,使用优先级来加载。
	 http.requestMatchers()
 .antMatchers("/login")
 .antMatchers("/oauth/authorize")
- 1
- 2
- 3
http.requestMatchers() 这个方法下配置的就是security 接收以什么样的请求,我们这里只接受/login和/oauth/authorize的请求 。
	 .authorizeRequests()
 .anyRequest().authenticated()
- 1
- 2
这两句配置的意思是除了以上请求所有的请求都需要身份认证才能访问。
	.formLogin().loginPage("/login").permitAll()
.and().csrf().disable();
- 1
- 2
这几个配置的意思是采用form表单登陆默认登陆页面是/login,任何人都能访问,关闭csrf的保护。
	@Override
 protected void configure(AuthenticationManagerBuilder auth) throws Exception {
 //使用内存模拟数据库查询的用户
 auth.inMemoryAuthentication()
 .withUser("admin")
 .password(passwordEncoder().encode("123456"))
 .roles("ADMIN");
 }
- 1
- 2
- 3
- 4
- 5
- 6
- 7
- 8
这里采用的是AuthenticationManagerBuilder 允许内存验证,这里我添加了一个用户名为admin 密码是 123456,角色是ADMIN的 一个用户 来模拟数据库查询的用户信息。
	 @Bean
 public PasswordEncoder passwordEncoder() {
 return new BCryptPasswordEncoder();
 }
- 1
- 2
- 3
- 4
PasswordEncoder 是Spring 官方提供的一个md5 密码加密器,一般用于密码的加密。
这个就是WebSecurityConfig的配置
下面我们在config中继续创建一个叫OauthServerConfig的类
	@Configuration
@EnableAuthorizationServer
public class OauthServerConfig extends AuthorizationServerConfigurerAdapter {
 @Autowired
 private PasswordEncoder passwordEncoder;
 @Override
 public void configure(final AuthorizationServerSecurityConfigurer security) throws Exception {
 security.tokenKeyAccess("permitAll()").checkTokenAccess("isAuthenticated()");
 }
 @Override
 public void configure(final ClientDetailsServiceConfigurer clients)
 throws Exception {
 clients.inMemory()
 .withClient("handleCilentId")//客户端id
 .secret(passwordEncoder.encode("secret"))//客户端密钥
 .authorizedGrantTypes("authorization_code")//授权码模式
 .scopes("user_info") //授权范围
 .autoApprove(true)//开启自动授权
 .redirectUris("http://localhost:8882/login") //认证成功重定向
 .accessTokenValiditySeconds(10);//设置超时时间
 }
}
- 1
- 2
- 3
- 4
- 5
- 6
- 7
- 8
- 9
- 10
- 11
- 12
- 13
- 14
- 15
- 16
- 17
- 18
- 19
- 20
- 21
- 22
- 23
- 24
- 25
- 26
这个类上也使用了两个注解,@Configuration 这个注解成为Spring的一个配置类,@EnableAuthorizationServer 注解是开启授权服务器认证
这个类继承了AuthorizationServerConfigurerAdapter 这个类提供了授权服务器策略。
这里我们实现了两个configure 认证策略方法,分别是AuthorizationServerSecurityConfigurer 和 ClientDetailsServiceConfigurer,
而AuthorizationServerSecurityConfigurer提供了十几个配置的方法,这里我们不会多去深入
其中 tokenKeyAccess意思是:oauth2授权服务器会提供一个/oauth/token_key的url来供资源服务器获取公钥,这个方法就是配置获取公钥的权限范围,它使用的是SpEL表达式且默认不开启, 这里我们使用的是permitAll(),让本身的oauth的访问不需要授权
checkTokenAccess意思是:授权服务器提供一个/oauth/check_token的url来供资源服务器解码令牌,该方法就是配置权限范围,同样使用的是SpEL表达式且默认不开启,我们这里设置的是 isAuthenticated(),检查access_token需要进行授权
当客户端向认证服务器认证的时候,我们需要判断这个客户端是否通过了认证那么就要使用ClientDetailsServiceConfigurer 它提供了三种认证方式
- clients.withClientDetails() :使用数据库认证
- clients.jdbc(): 传入一个dataSource 这里可以使用自定义的dataSource
- clients.inMemory():内存认证 相当于将认证信息 写死
这样我们就将授权服务器配置好了。
下面我们创建一个controller的包
创建一个LoginController 登陆的控制器
	@Controller
public class LoginController {
 @GetMapping("/login")
 public String loginPage() {
 return "login";
 }
}
- 1
- 2
- 3
- 4
- 5
- 6
- 7
这里返回的是一个login的 html 页面
login.html
	<!DOCTYPE html>
<html lang="en">
<head>
 <meta charset="UTF-8">
 <title>login</title>
</head>
<body>
<h1>标准登陆</h1>
<form action="/auth/login" method="post">
 username: <input type="text" name="username"/> <br/>
 password: <input type="password" name="password"/> <br/>
 <button type="submit">登陆</button>
</form>
</body>
</html>
- 1
- 2
- 3
- 4
- 5
- 6
- 7
- 8
- 9
- 10
- 11
- 12
- 13
- 14
- 15
- 16
- 17
在创建一个UserInfoController 用于获取认证成功的用户信息
	@RestController
public class UserInfoController {
 private Logger logger = LoggerFactory.getLogger(this.getClass());
 @RequestMapping("/user")
 public ResponseEntity<Object> getUser(Principal principal) {
 logger.info("principal:" + principal);
 return new ResponseEntity<Object>(principal, HttpStatus.OK);
 }
}
- 1
- 2
- 3
- 4
- 5
- 6
- 7
- 8
- 9
applicatin.yml 配置
	server:
 port: 8880
 servlet:
 context-path: /auth
- 1
- 2
- 3
- 4
然后我们创建2个客户端分别是oauth_client1 和 oauth_client2
oauth_client1 的依赖如下:
	<?xml version="1.0" encoding="UTF-8"?>
<project xmlns="http://maven.apache.org/POM/4.0.0" xmlns:xsi="http://www.w3.org/2001/XMLSchema-instance"
 xsi:schemaLocation="http://maven.apache.org/POM/4.0.0 http://maven.apache.org/xsd/maven-4.0.0.xsd">
 <modelVersion>4.0.0</modelVersion>
 <parent>
 <groupId>cn.com.scitc</groupId>
 <artifactId>spring_sso_parent</artifactId>
 <version>1.0-SNAPSHOT</version>
 </parent>
 <groupId>cn.com.scitc</groupId>
 <artifactId>oauth_clinet1</artifactId>
 <version>0.0.1-SNAPSHOT</version>
 <packaging>war</packaging>
 <name>oauth_clinet1</name>
 <description>this is client1</description>
 <properties>
 <java.version>1.8</java.version>
 </properties>
 <dependencies>
 <dependency>
 <groupId>org.springframework.boot</groupId>
 <artifactId>spring-boot-starter-thymeleaf</artifactId>
 </dependency>
 <dependency>
 <groupId>org.springframework.boot</groupId>
 <artifactId>spring-boot-starter-web</artifactId>
 </dependency>
 <dependency>
 <groupId>org.springframework.boot</groupId>
 <artifactId>spring-boot-starter-security</artifactId>
 </dependency>
 <dependency>
 <groupId>org.springframework.security.oauth.boot</groupId>
 <artifactId>spring-security-oauth2-autoconfigure</artifactId>
 <version>${oauth-auto.version}</version>
 </dependency>

 <dependency>
 <groupId>org.springframework.boot</groupId>
 <artifactId>spring-boot-devtools</artifactId>
 <scope>runtime</scope>
 <optional>true</optional>
 </dependency>
 <dependency>
 <groupId>org.springframework.boot</groupId>
 <artifactId>spring-boot-starter-test</artifactId>
 <scope>test</scope>
 </dependency>
 </dependencies>
 <build>
 <plugins>
 <plugin>
 <groupId>org.springframework.boot</groupId>
 <artifactId>spring-boot-maven-plugin</artifactId>
 </plugin>
 </plugins>
 </build>
</project>
- 1
- 2
- 3
- 4
- 5
- 6
- 7
- 8
- 9
- 10
- 11
- 12
- 13
- 14
- 15
- 16
- 17
- 18
- 19
- 20
- 21
- 22
- 23
- 24
- 25
- 26
- 27
- 28
- 29
- 30
- 31
- 32
- 33
- 34
- 35
- 36
- 37
- 38
- 39
- 40
- 41
- 42
- 43
- 44
- 45
- 46
- 47
- 48
- 49
- 50
- 51
- 52
- 53
- 54
- 55
- 56
- 57
- 58
- 59
- 60
- 61
- 62
- 63
- 64
- 65
同样创建一个config 包 并且创建一个 Oauth2ClientSeurityConfig这个类
	@Configuration
@EnableOAuth2Sso
public class Oauth2ClientSeurityConfig extends WebSecurityConfigurerAdapter {
 @Override
 protected void configure(HttpSecurity http) throws Exception {
 http.csrf().disable() //关闭csrf保护
 .antMatcher("/**") //使用以任意开头的url
 .authorizeRequests() // 配置路径拦截,表明路径访问所对应的权限,角色,认证信息
 .antMatchers("/", "/login**") //控制不同的url接受不同权限的用户访问
 .permitAll()// 允许所有人访问
 .anyRequest()
 .authenticated(); //除了以上请求都需要身份认证
 }
}
- 1
- 2
- 3
- 4
- 5
- 6
- 7
- 8
- 9
- 10
- 11
- 12
- 13
- 14
- 15
- 16
这个类继承了 WebSecurityConfigurerAdapter 这个SpringSecurity的适配器,实现了HttpSecurity 的 configure 方法。 这个类也是两个注解 @Configuration 成为一个配置类,
@EnableOAuth2Sso 启用Oauth2的单点登陆。
我们再创建一个controller 包 ,并且创建一个 InfoController
	@Controller
public class InfoController {
 @GetMapping("/getUser")
 public ResponseEntity<Object> userPage(Principal principal) {
 //客户端认证成功后返回这个用户信息
 return new ResponseEntity<Object>(principal, HttpStatus.OK);
 }
 @GetMapping("/")
 public String indexPage() {
 return "index";
 }
}
- 1
- 2
- 3
- 4
- 5
- 6
- 7
- 8
- 9
- 10
- 11
- 12
- 13
index.html 页面
	<!DOCTYPE html>
<html lang="en">
<head>
 <meta charset="UTF-8">
 <title>index</title>
</head>
<body>
<h1>请登录授权</h1>
<a href="/getUser">login</a>
</body>
</html>
- 1
- 2
- 3
- 4
- 5
- 6
- 7
- 8
- 9
- 10
- 11
application.yml
	auth-server: http://localhost:8880/auth
server:
 port: 8881
 servlet:
 context-path: /
security:
 basic:
 enabled: false
 oauth2:
 client:
 clientId: handleCilentId
 clientSecret: secret
 accessTokenUri: ${auth-server}/oauth/token
 userAuthorizationUri: ${auth-server}/oauth/authorize
 resource:
 userInfoUri: ${auth-server}/user
spring:
 thymeleaf:
 cache: false
- 1
- 2
- 3
- 4
- 5
- 6
- 7
- 8
- 9
- 10
- 11
- 12
- 13
- 14
- 15
- 16
- 17
- 18
- 19
- 20
- 21
auth-server:是目标认证服务器
clientId: 目标认证服务器设置的客户端id
clientSecret: 目标认证服务器设置的密码
accessTokenUri:从目标认证服务器获取令牌token
userAuthorizationUri:从目标认证服务器请求授权默认url是/oauth/authorize
userInfoUri: 从目标认证服务器上将认证信息Principal通过形参绑定的方法通过URL的方式获取用户信息
oauth_client2配置和 oauth_client1是一样的
我们启动 认证服务器oauth_server 和 两个客户端 oauth_client1 和 oauth_client2
chrome 浏览器访问 localhost:8881
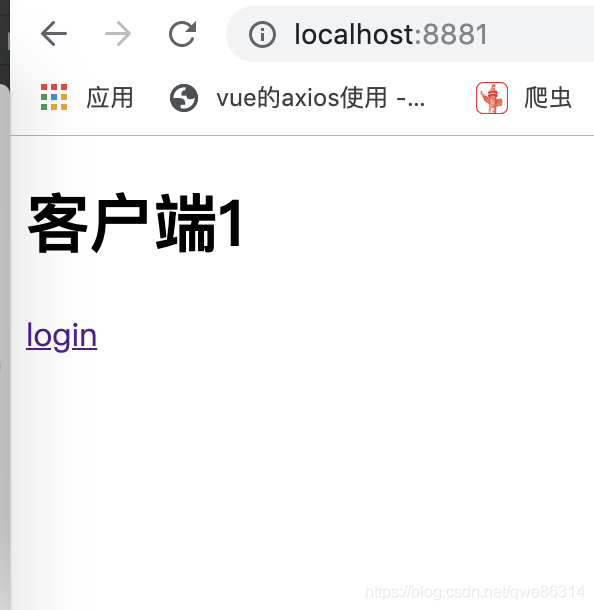
当我们点击login的时候会跳转到认证服务器进行登陆授权
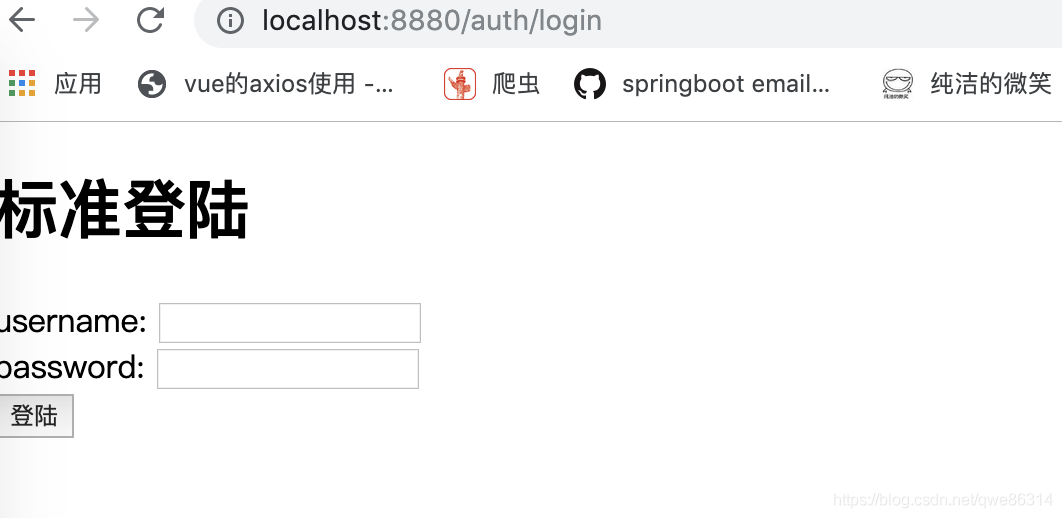
授权成功后 返回了 这个用户的所有的信息
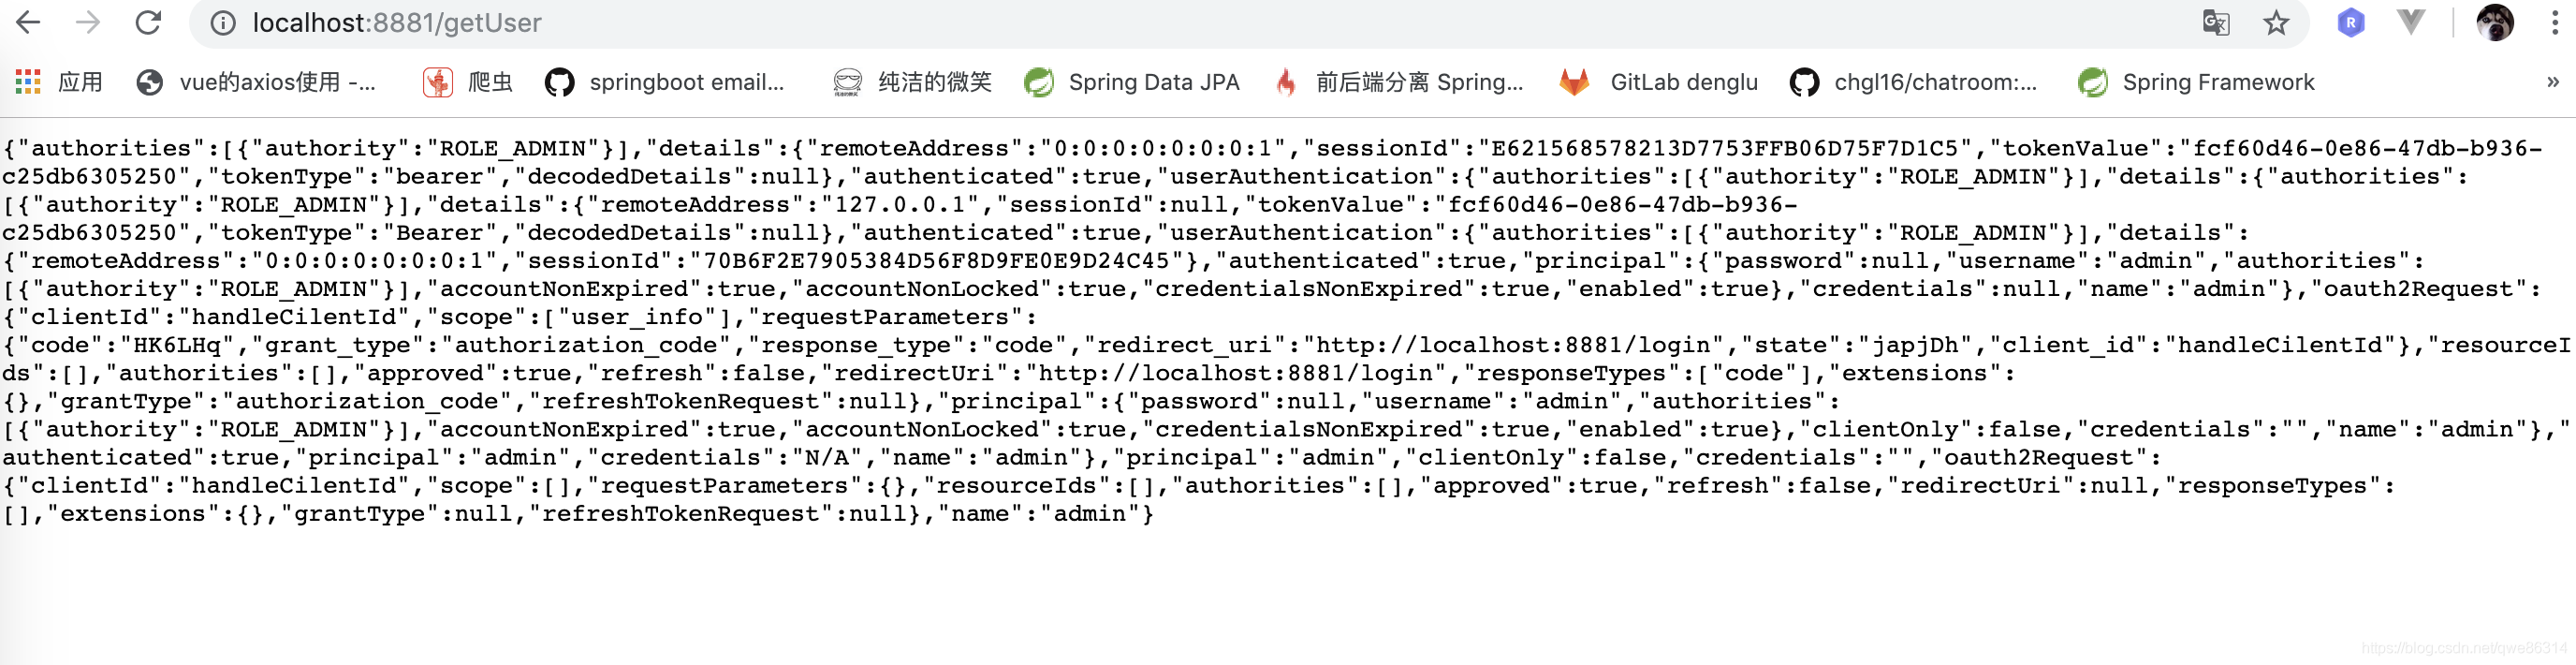
我们再去访问localhost:8082
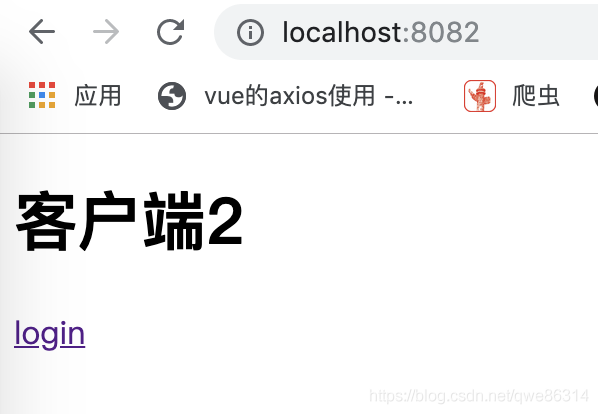
当我点击登陆的时候 ,并没有出现登陆授权,直接拿到了用户信息
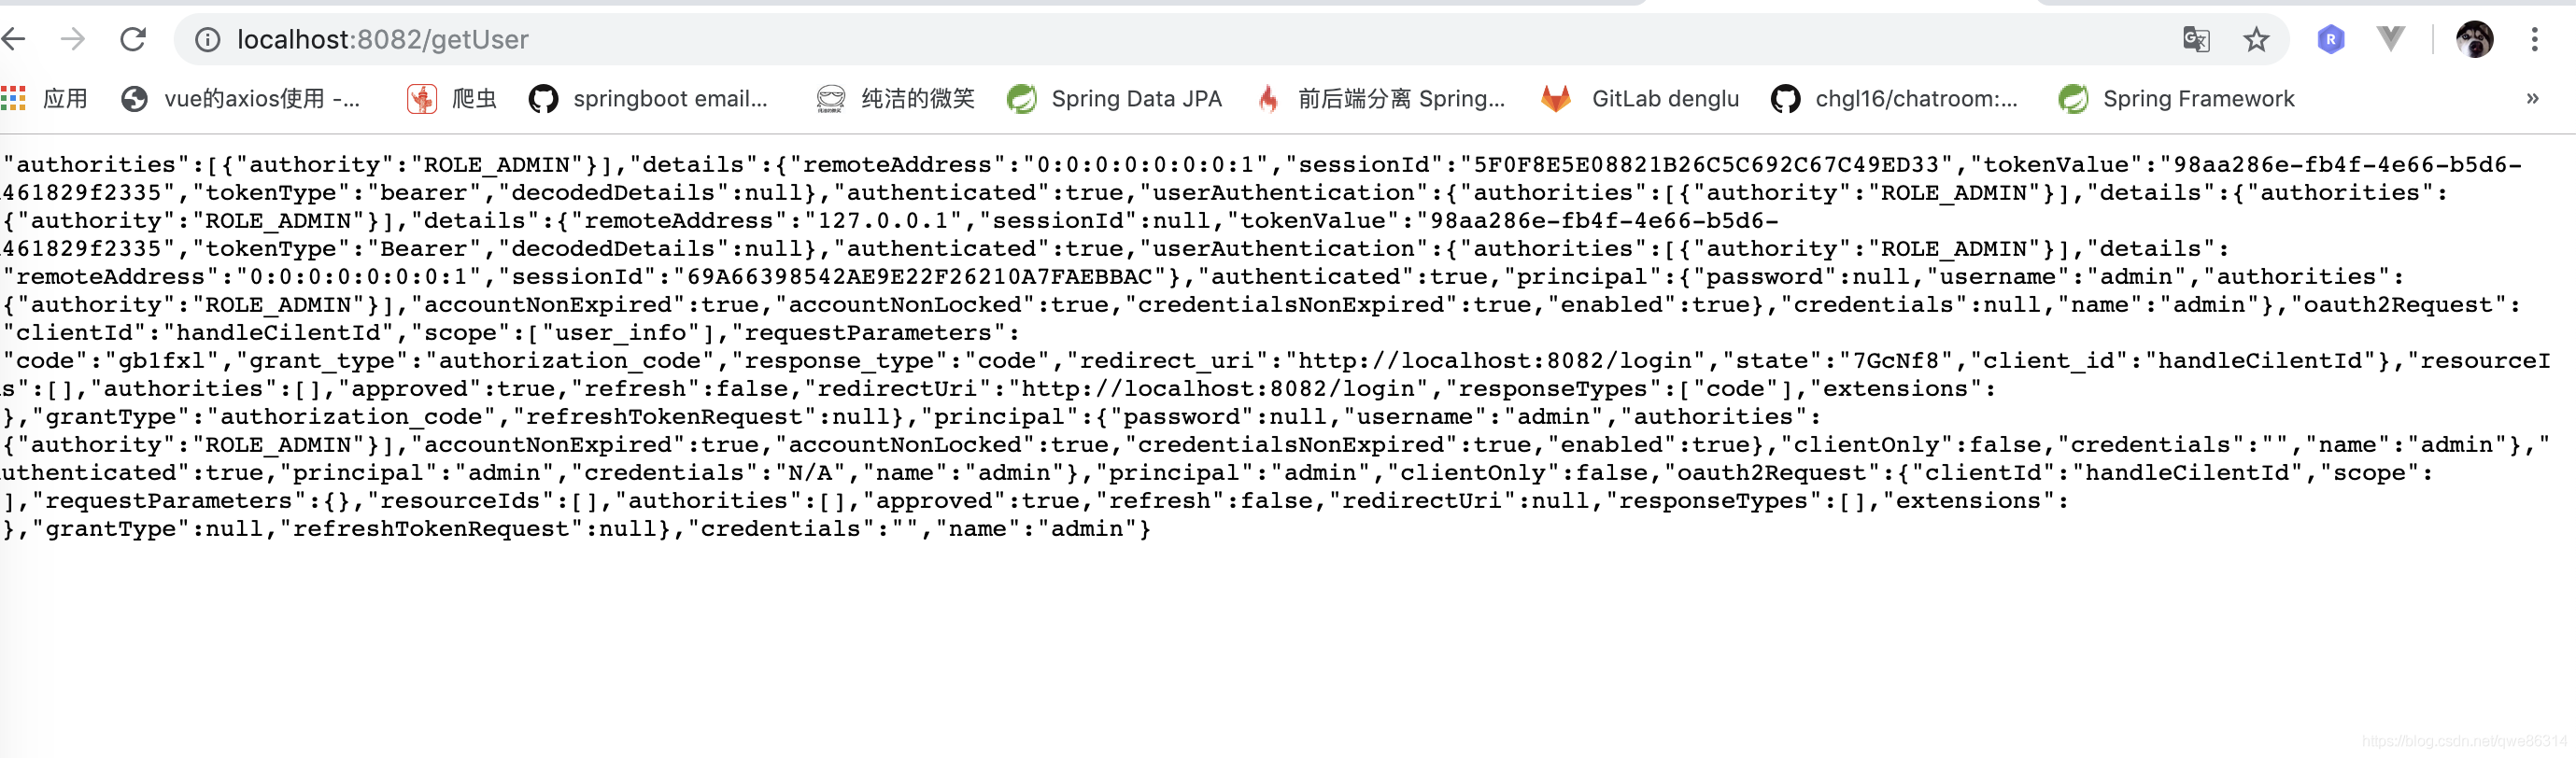
注意这里我们不管是访问客户端1还是客户端2 ,还是n多个客户端,只要有一个授权成功 那么访问其它的客户端就不需要登陆 就能访问相关的rest服务了。
总结
oauth2 实现的单点登陆 并不是很复杂,归根结底,Spring帮我们做了太多的底层实现,让我们实现起来非常的简单 实现几个接口就可以搞定授权服务器的配置,客户端的配置也非常的简单。现在我们流行看到了如百度,我登陆了百度,那么就可以直接访问百度贴吧,百度糯米,等。单点登陆运用已经使用的非常的广泛。所以我认为掌握单点登陆是十分有必要的。